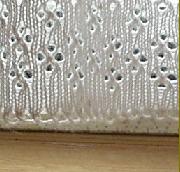
SKILL: Beginner
SIZE: Change for your Gauge
MATERIALS: ? As much as it takes.
YARN: 2 STRANDS OF UNKNOWN 2/24
GAUGE: Make your own swatch….
MACHINE: Knitking Compuknit 3
TENSION: Carriage (6)


A.K.M. Designs
Well the response to my curtains definitely took me off guard so I will post the pattern as best I can explain it… (just a reminder… I have never shared a pattern before in this manner so bear with me while I learn how to do this). I also tried to write this pattern in a manner that would help anyone figure how to knit curtains for there measurements. so some of it is long winded.
CURTAINS:
|
SKILL: Beginner SIZE: Change for your Gauge MATERIALS: ? As much as it takes. YARN: 2 STRANDS OF UNKNOWN 2/24 GAUGE: Make your own swatch…. MACHINE: Knitking Compuknit 3 TENSION: Carriage (6) |
|
NOTE:
This pattern can be changed to what ever lace pattern you want to use… the
pattern is easy to figure.
PATTERN:
Measure height and width of the window you want to embellish. Divide height by
2 and add three inches… (i.e. my window was say
32 inches wide. 32 divided by 2 = 16 + 3 + 19 inches.)
Now times that by the width of your gauge and that will give you the amount of
needles you want to use… (the 3 extra inches helps the curtains meet in the
middle and cover the edges of your curtain rod on the sides.) Now take your
height of your window and add one inch. To 1.5 inches to your pattern. (43
+ 1 or 1.5 = (44) or (44.5))
This will depend on your taste. Now figure the amount or rows you need. (44
or 44.5 x row gauge = amount of rows)
I liked the way the edge turned out and the way that you do this is to
e-wrap every other needle
(eon). Hang Cast on combs and weights and knit 2 or three rows in regular knit.
Set your lace pattern
making sure to lace when your suppose to and knit when your suppose to.
Knit until you finish the amount of rows you need. Place every other needle in
hold position (position D) set cam to hold knit 1 row place cam to knit. Knit 1
row.
(Notice that you have threads to extend over 2 stitches. These will be used for hanging your hem… knit approximately 30 rows of regular knit. Now its time to hang your hem. With your 1 x 2 transfer tool (using the single side) pick up one of the hem stitches (the thread that extends 2 stitches) follow that line of stitches up to the needles and lay your hem stitch on that needle. Follow this process until all the hem stitches are on a needle. These hem stitches should be between the front of the needle and the open latch. All threads should be in this position. If not using your transfer tool make sure they are their...Slowly and carefully push all the needles towards position A of your knitting machine until there is only one thread on each needle then keeping your knitting next to the bed pull all needles to the D or holding position and bind off. Bind off can be done anyway you are comfortable with. I did my cast off with my latch tool placing the latch tool on the end of the needle and pulling it thru my knitting so that the stitch was on the latch tool grabbing the yarn and pulling it around the gate peg and back thru the knitting until the last stitch was done then Walla it was done.
NOTE: Just for a little more interest make a length of I-Cord on
your machine to use as tiebacks, or some ribbed ties.
If you print and use and like this pattern please feel free to let me know by making a $1.00 donation.